You have two choices when it comes to window tinting. You can pay a professional to do it or you can do it yourself. The price difference is massive. This guide focuses on the DIY route because saving money usually means getting your hands dirty. But be warned. The technique matters as much as the film you buy. Mess up the application and you will end up with bubbles, peeling edges, and a wasted roll of tint.
Prep Work and Cutting
Start with a clean window. I mean truly clean. Any dust or grit will be trapped under the film forever. You need a squeegee, a razor blade, a spray bottle with soapy water, and the tint film itself.
Measure your glass. Cut the film slightly larger than the window. Leave about 3/4 to 1 inch of extra material on all sides. This overhang gives you room to maneuver during application.
Here is the tricky part. You need to expose the adhesive. Peel back the protective liner. Do this slowly. If you are working alone, you might struggle. Having a friend help separate the liner from the sticky side can save you from ruining the film before it even touches the glass.
The Wet Application Method
Most window film adhesives are water-activated. This is why you spray both the window and the adhesive side of the film with a wetting solution. Usually, just a mix of water and a few drops of dish soap works fine.
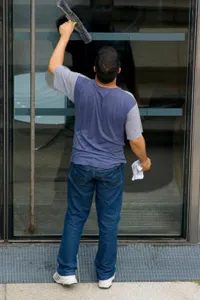
Place the film on the glass. It should slide around easily. This wet layer lets you position the tint perfectly before you commit. Use your squeegee to push the water out from under the film. Work from the center outward.
Keep squeegeeing. Keep adding solution if needed to keep things slippery. You are looking for a smooth, bubble-free finish. It takes practice. Your first attempt might not be perfect. That is normal.
Trimming and Curing
Once the film is smooth and positioned correctly, trim the excess. Use a sharp razor blade. Cut along the edge of the glass. Be careful not to scratch the paint or frame.
Blot the edges with a towel to remove excess water. Then, step back.
The film is not done yet. It needs to cure. This is the drying process. It can take a few days. It can take a month. Do not roll down your windows or peel at the edges during this time. Patience is key.
Cost Breakdown
Why do this yourself? The price. DIY films cost around $1 per square foot. Professional installations can run you $35 per square foot or more. That is a huge difference.
Keep in mind that some brands are only sold to pros. You cannot just buy them off the shelf. If you see a film you like, check if it is available to the public. If it is not, you have to either hire a pro or find a different product.
DIY tinting is cheaper. It is also riskier. One slip and you waste material. One bubble and you ruin the look. But if you take your time and follow the steps, you can save a lot of money. Just make sure your workspace is clean and your tools are ready.