Keeping the pool water clean doesn’t have to be a weekend job. It can seem like a mountain, especially if you’ve never done it before. But the truth is simpler. Pools vary widely. A fiberglass shell in Arizona requires different love than a concrete gunite pool in humid Florida. However, the basic principles are absolute. If you put in the time and effort, you can learn how to clean your pool effectively.
There is one general rule for all water bodies. Regular maintenance is the only secret to good health. You can hire an expert. You can buy fancy automatic cleaners. However, if you want to solve problems like cloudy water or a clogged pump yourself, stop and read the user manual. Seriously. Manufacturer’s manuals exist for a reason. They tell you what not to break. Even if you hire a service company, the physical reality of water is still there. You have to be involved too.
Remove surface debris and baskets
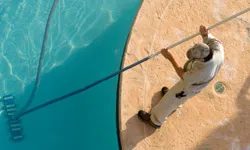
The easiest way to keep the water clean is manual intervention. Do this every few days. Floating leaves attract algae. Algae sinks. Sunk debris becomes a stain or a breeding ground for bacteria. Prepare a skimmer net with a long handle. The leaf skimmer. Drag the surface. Remove bugs. Remove the branches. Remove whatever nature drops in your backyard.
This physical work is not just for show. It directly affects your chemistry. A cleaner surface means that the recycling system works harder on water instead of waste. The amount of chlorine used is reduced. Fewer chemicals are needed. This saves money. Here’s how you can protect your skin.
Don’t forget the hardware. The filter basket is the lungs of the pump. If it gets blocked, the cycle stops. Check once a week. Above ground pools are often hidden on the sides. An underground pool pushes them onto the deck. Remove the plastic basket. Please shake it. What happens if the leaves stick together? Spray with a hose. Clean the internal organs.
Vacuuming and scrubbing
When the surface is clean, look at the bottom. There are also sides.
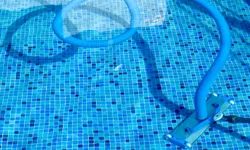

Vacuum the pool once a week. Sounds simple, but skipping this can mean cloudy water and chemical overload. If you use a manual vacuum head, treat it like a carpet. Go back and forth. Overlap your strokes slightly. This ensures that you catch everything. Don’t skip checking the filters during this process. If it becomes clogged, clean it immediately.
Choose the right brush for your pool wall
Brushing is the second half of your weekly routine. Prevents the formation of algae and calcium deposits. You cannot ignore the material of the walls.
- Plaster or concrete: Use a stiff brush. You have to scrub hard to get into the texture.
- Vinyl or fiberglass: Use a soft brush instead. Scrubbing the vinyl with a hard brush can cause it to tear.
- Tiles: Use a soft brush. You want to protect the grout, not grind it away.
If you have stubborn spots, using a pumice stone or putty knife can be effective. You can also use a mixture of half water and half muriatic acid, but be very careful.
When should the pool filter be cleaned
There are three main types of pool filters. Available in cartridges, sand or diatomaceous earth (DE). Everyone has their own maintenance rhythm. However, there is a counterintuitive truth. You don’t need a perfectly clean filter.
A clean filter is less efficient than one with little dirt because dirt traps other particles and helps remove debris from the water.
If it is too clean, the water flows easily and carries the debris with it. However, if there is too much dirt, the system chokes. How do you know when to act? Observe the pressure gauge. Compare this with a flow meter. When the difference reaches 10 to 15 pounds per square inch (psi), it’s time to clean. This equates to approximately 4.5-6.8 kilograms per square inch. Don’t wait for the pump to struggle.
Servicing the Heater
It is not enough to use the heater once a week. You need an expert to do this.
Pool heaters are masters of lazy maintenance. They require little attention compared to pumps, filters and skimmers. Even if you don’t touch a gas heater for two years, it can still fire up. An electronic model? It may take longer. But don’t rot the internals with complacency.
Calcium scales likes to hide inside heating pipes. When they accumulate, they restrict the flow of water and suddenly the water is lukewarm at best. If you’re having trouble with your heater, you may want to looking at a professional job. You have to tubes need to be disassembled. Usually you have to scrub it clean with a wire brush or an acidic solution. This is not a weekend DIY project. If you hire a professional to handle this, you can expect to pay upwards of $100 per month for regular maintenance, depending on the demand for a particular pool.
How often should I fill the pool?
Evaporation doesn’t ask for permission. There is also no possibility of splashes, swimmers leaving the deck or backwashing. A large amount of water is lost throughout the season. The best time to check the fluid level is whenever you skim debris. It takes 3 seconds.
Make sure the water is in the center of the skimmer opening. When it falls below the skimmer inlet, the pump sucks in air. If you let air in, the pump dies. It’s that simple. If the water level is low, connect a garden hose. Fill it up. Stop it before it overflows into the gutter.
Why it is important to leave water in the pool
There is a scary myth that empty swimming pools are safer. They aren’t. If you are emptying the pool due to major repairs or the end of the season, do not leave the pool empty for long periods of time.
The earth presses upwards against the walls of the pool. Hydrostatic pressure. When the pool is full, the weight of the water inside counteracts the pressure from the ground. Empty pool? The ground wins. Your shell can crack, pop, or shift. Leave water in the pool throughout the winter. It’s the anchor that keeps the structure intact.
Maintain pH
pH is a silent killer that affects pool equipment and swimmers’ comfort. Balance isn’t the only thing that matters. It’s all about chemistry. If the pH gets too high, calcium precipitates. It clumps. It coats your heater tubes in the scale mentioned earlier. The water becomes cloudy.
If the pH drops too much, the water becomes acidic. It eats away at metal components. It corrodes the ladder. It can damage the plastering of the pool. It can also sting the eyes and dry the skin. Most people carefully check the chlorine level but ignore the pH. This is wrong.
You need a reliable test kit. Strips are okay for a quick glance. Liquid drop tests is more accurate. Check the pH at least twice a week during heavy use. you need to adjust it if it is outside the range of 7.2 to 7.6.
Adding soda ash raises the pH. It can be reduced by adding muriatic acid. Pour slowly near the return jets so it disperses quickly. Wait for the pump to circulate. Test again. Don’t guess. The margin of error is small. One tablespoon too much can swing the balance enough to cause scaling and corrosion within days.
This isn’t a set-it-and-forget-it task. It’s a constant tug of war
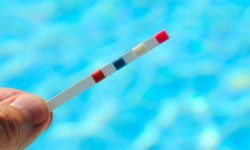
Testing your pool water doesn’t just mean avoiding a doctor’s visit. This prevents water from corroding the equipment. The pH scale measures acidity and alkalinity on a scale of 0-14. This number must be between 7.2 and 7.8. If the swimmer stays within that window, they won’t itch. When you put it in there, the disinfectant actually works.
How do I check this? Grab a testing kit.
Most homeowners stick to two types. Reagent kits or test strips.
Reagent kits involve taking a water sample. You add liquid drops or tablets. The color of the water changes. That color tells you where you stand on the chemical balance. It’s very simple.
Test strips are faster. Dip them in for a few seconds. The dye inside reacts with water. Take them out and match the colors to the pictures on the box. Knowing the pH tells you what chemicals to add and in what quantities.
Superchlorinate Water
Do people hate that pungent smell of chlorine? Actually, it’s not chlorine. This is chloramine.
Chloramines are formed when organic pollutants such as ammonia and nitrogen accumulate over time. They interact with free chlorine. As a result, a strong odor is produced. This is also why your eyes hurt.
To kill the smell, you need to superchlorinate. This is also known as shocking the pool.
It sounds like the opposite. Do I add chlorine to get rid of the chlorine smell? Yes. Electric shock can increase the chlorine concentration and oxidize chloramines. When decomposed, the smell disappears.
How often should I do this?
Some pools need a shock once a week. Others can go longer. Factors such as repeated use, rain and high temperatures can change the amount of disinfectant.
Read the manufacturer’s instructions before pouring chemicals. The dosage varies according to the type of product. Calcium hypochlorite behaves differently than sodium dichloride. Adjust the ratio correctly. Under-shock and the chloramines linger. Over-shock and you might damage plaster or vinyl.
Find and repair leaks
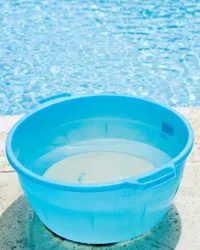

Determining whether your pool is evaporating or slowly leaking can often be frustrating. You might think the sun is doing its job, but hidden cracks can drain your bank account faster than the heat. Bucket testing is a common way to separate fact from fiction.
Prepare a plastic bucket. Fill it about 3/4 of the way. Mark the water level on the inner wall. Also mark the outer waterline. If your bucket has a handle, remove it. The stability decreases and the test becomes less reliable. Place the bucket in the pool and let it float freely.
Leave it on for 2-3 days. Then check the level again.
If the water inside and outside the bucket decreases by the same amount, it’s just evaporation. The sun took what it needed. If the pool’s water level gone down more than the water level in your bucket, that’s a sign of a leak. This is your signal to call a professional. Don’t try to fix it yourself unless you know what you’re doing. Applying the wrong patch can make the problem worse.
Winterize the swimming pool
Your location determines your winterization strategy. If you live in an area where temperatures are below freezing, you cannot skip this step. Failure to do so may result in cracked pipes and cracked housings. The repair costs seem small compared to the costs of winterization.
Start with the plumbing. If water remains in the pipes, it can freeze and expand, causing the pipes to crack. At the end of the swimming season, blow out the water with an air compressor. This is a manual process. This requires patience. But it protects the infrastructure.
Drain as much water as possible from the filter and heater. The remaining water can be neutralized with a non-toxic pool antifreeze. Be careful here. This is different from the ethylene glycol found in cars. Antifreeze from vehicles is toxic and interferes with water chemistry and can damage your equipment if it later gets into a puddle. Only use products specifically designed for use in swimming pools.
Disconnect the heaters, pumps and chemical feeders. Clean and store the feeder. No need to sit outside in the cold.
Finally, clean the pool itself. Skim the surface. Scrub the walls to remove algae spores. Vacuum the bottom. Empty the skimmer basket. Close the skimmer line valve to prevent water from flowing back into the pipes. Lower the water level to about 18 inches (45 cm) below the coping. This leaves room for the ice to expand without causing cracks in the lining or walls. Superchlorinate to kill any remaining bacteria. Cover the pool to keep debris out. A clean pool in winter is a healthy pool in spring.
Open Your Pool for Swimming Season
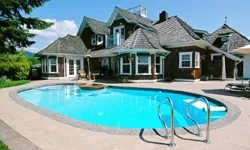
Remove the trash before you find it
Preparing your pool for the summer starts before you take the cover off. Winterizing properly takes care of the hard part, but diving into the water is a mistake. Do not remove the cover before cleaning the deck.
Sweep up fallen leaves. Hose down to the patio. First you need to remove that unpleasant thing from the ground. If you remove the cover while the debris is still accumulating, the debris and branches will fall in. Now, before we start filtering, we need to skim the pool full of trash. Please do the right thing. Start by cleaning the area.
Reconfigure and reboot the system.
When the area is clear, grab a garden hose. Fill the pool to normal water level. Don’t overthink it. Pull it back into line.
Reconnect everything. If you took out plugs or disconnected any lines, put them back in place. In order for water to do its job, it must flow through a circulation system. Open the skimmer line valve. Suction is needed to force the water through the filter and pump.
Test and shock
Before jumping into the water, test the water. Check the pH. If it is off, the chlorine will not work properly and your skin may become irritated. Adjust the chemistry. Then shock the pool.
Shock therapy can kill survived the winter bacteria and algae. It burns brightly and cleans the water. But don’t expect results right away.
Activate the pump
It takes a week or more for the pool to reach equilibrium. It is not ready to swim yet. Let the pump run 24 hours a day. Keep it on. Let the filter do its job.
When the water starts to clear and the chemicals stabilize, you can shorten the usage time. Cut just 1-2 hours each day. Watch the water. As long as it’s balanced, you’ll be fine. If it gets cloudy, turn the pump back on for a longer period of time.
It may take a week or more for the pool to reach equilibrium and be ready for swimming.
Eventually the water clears. The pH remains stable. Then you can finally open the gates.
More information about pool maintenance
- Aboveground Swimming Pool Care
- What to consider before installing a swimming pool
- How the swimming pool works
- How to incorporate a swimming pool into your garden
- Swimming Pool Cleaners
Sources
- Fran J. Donegan and David Short. “Creative Homeowner Pools and Spas: Ideas for Planning, Designing, and Landscaping” Creative Homeowner. 2003.
- Ramsey, Dan. “Trouble-free Swimming Pools”. TAB Books 1985.
- Rist, Curtis, Vicki Webster and editor of Sunset Books. “Sunset Swimming Pools and Spas” Sunset Publishing. 2005.